

We have recently had tutorials in our lessons on how to use the special effects make up and we were shown how to create the best cuts, scars, scabs etc. We had a professional in who has worked on shows such as Doctor Who which gave our group and class ideas and knowledge on how special effects are used and created. We were allowed to create our own moulds and were given examples of bullets holes, stab wounds, cuts a nd grazes which gave us a wider choice on choosing our special effects for our group. We were shown how to make them look as realistic as possible by making the outer edge as thin and smooth as possible as when it came to applying this to the actor, a thin edge would make it look more realistic and make it easier for it to blend in with the skin. We are lucky to be able to have the access to many equipment and products such as scab, fake blood, moulds, wax and latex. We were shown also how to make fake blood which consisted of simply honey and food colouring, the colou
 r of the honey mixed with the colouring made it look more realistic as sometimes the fake blood is to bright which makes it actually look “fake”. I was also told that adding a drop of milk makes the blood opaque so you won’t be able to see through it. So when using the make up it will be worth experimenting with the different products to see which the best is for us.
As my role of researcher I have been looking up on how to achieve the best results when using make up and came across many different websites with tips and advice.
 http://www.ehow.com/how_4431994_use-special-effects-makeup-cuts.html
This is on website I have found which gives instructions on creating a black eye, this looks simple to create and could be achieved easily, a black eye is also something that can be used in many different scenarios so it is defiantly a possible effect we can use in our trailer. There are many tutorials on the internet including YouTube which have helped giving us ideas on what effects to use. We want to make the actress look as scary as possible without it looking to fake/unrealistic.
For our trailer we have decided to keep the make up simple to make it more realistic. We were originally going to use cuts and scabs to create a killers hand and to make it look as if it was bitten, but when we decided to change our storyline we used simple make up to make it look more real. We used fake blood all over our props including clothing, blankets and teddy bears, as we wanted to make it look as if the character had been in danger. We then used mascara all over the cheeks of the actress so make it look as if she had been crying and it had been there for a while as we wanted to create a crazy character. We also used red lipstick as the colour red has connotations of danger, and we used if on her lips and around her mouth, so we smudged it to show her anger and her not wanted this
this  make up on her face.
 nd grazes which gave us a wider choice on choosing our special effects for our group. We were shown how to make them look as realistic as possible by making the outer edge as thin and smooth as possible as when it came to applying this to the actor, a thin edge would make it look more realistic and make it easier for it to blend in with the skin. We are lucky to be able to have the access to many equipment and products such as scab, fake blood, moulds, wax and latex. We were shown also how to make fake blood which consisted of simply honey and food colouring, the colou
 r of the honey mixed with the colouring made it look more realistic as sometimes the fake blood is to bright which makes it actually look “fake”. I was also told that adding a drop of milk makes the blood opaque so you won’t be able to see through it. So when using the make up it will be worth experimenting with the different products to see which the best is for us.
As my role of researcher I have been looking up on how to achieve the best results when using make up and came across many different websites with tips and advice.
 http://www.ehow.com/how_4431994_use-special-effects-makeup-cuts.html
This is on website I have found which gives instructions on creating a black eye, this looks simple to create and could be achieved easily, a black eye is also something that can be used in many different scenarios so it is defiantly a possible effect we can use in our trailer. There are many tutorials on the internet including YouTube which have helped giving us ideas on what effects to use. We want to make the actress look as scary as possible without it looking to fake/unrealistic.
For our trailer we have decided to keep the make up simple to make it more realistic. We were originally going to use cuts and scabs to create a killers hand and to make it look as if it was bitten, but when we decided to change our storyline we used simple make up to make it look more real. We used fake blood all over our props including clothing, blankets and teddy bears, as we wanted to make it look as if the character had been in danger. We then used mascara all over the cheeks of the actress so make it look as if she had been crying and it had been there for a while as we wanted to create a crazy character. We also used red lipstick as the colour red has connotations of danger, and we used if on her lips and around her mouth, so we smudged it to show her anger and her not wanted
 this
this  make up on her face.
 PREPARING TO FILM

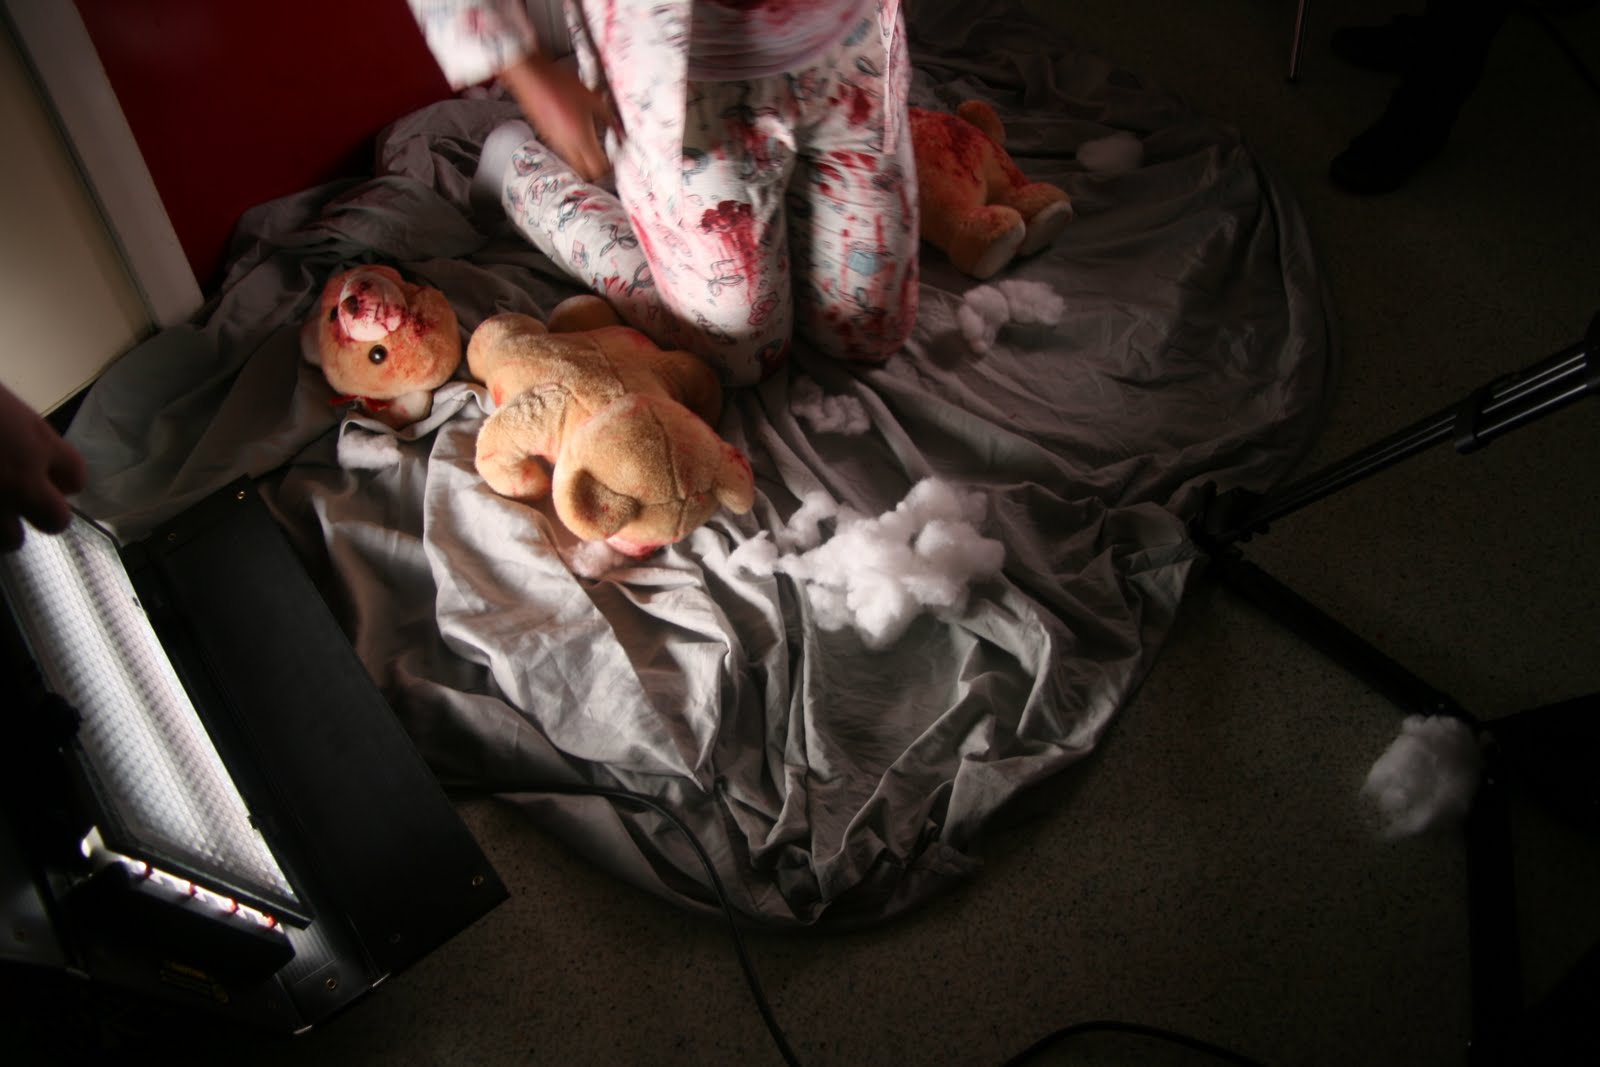
As we are due to start the filming of our trailer we thought it would be a good idea to get all of our props together and prepare them for when we start shooting. As our trailer is based in a mental institution our story is of a girl who is trying to escape as she has been there from a child and is on a rampage. So we thought that good props would be teddy bears and children’s pyjamas and we also used a sheet which was to be later on destroyed.
First we started by covering the teddy bears in blood. I smothered it all over the bear and used handprints to it looks as if the ‘killer’ has been handling these teddy bears. We thought it would be a good idea to cut up the teddies as if they have been torn apart, like the “crazy women’s” life had been so poked holes using scissors in the teddies mouths and pulled fur out from the inside. We wanted to reflect this women’s life through the teddy bears and as they were completely messed up it reflects her mental state and feelings are all over the place.
As we were using 2 teddies we decided to pull of one of their heads to make it look as if the women’s anger has been taken out on these and she has attacked them. After hard effort to rip the head of, and meant stabs with scissors in the neck of the fur to release the head we were finally able to take of the head and pull more of the insides out and scatter them all over the set. We wanted create the idea that this woman was mental and had gone crazy so we had to make sure we had the perfect set for this.
So we decided also to make the pyjamas looked messed up and poured blood all over them and again used hand prints and brushes to smear the blood everywhere. The reason that the pyjama top would not be closed is because as she has grown up in the institution I thought it would work well if it shows that she has grown out of the pyjamas and the reason that they are so small is because they are representing her childhood just like the teddy bears are.
Another prop we had was a big sheet, which was to represent where the killings have happened as this prop is in were she lays and is also covered in the blood. The blanket and teddies show her comfort zone, as from a young children normally feel attached to some sort of item so there props were showing this.
We decided to film in a hallway as we wanted to show how the woman has escaped, and as there is a red door out side of our class room the group thought that this was the perfect spot to film as the door shows freedom on the other side, but the red also had connotations of blood, which is shown in every shot.
We wanted to create a set of madness, and didn’t want to reveal too much through the setting and that’s why we have decided to not change the setting throughout as we don’t want to reveal too much of the storyline.
FILMING UPDATE

As we are due to start the
 filming of our trailer we thought it would be a good idea to get all of our props together and prepare them for when we start shooting. As our trailer is based in a mental institution our story is of a girl who is trying to escape as she has been there from a child and is on a rampage. So we thought that good props would be teddy bears and children’s pyjamas and we also used a sheet which was to be later on destroyed.
First we started by covering the teddy bears in blood. I smothered it all over the bear and used handprints to it looks as if the ‘killer’ has been handling these teddy bears. We thought it would be a good idea to cut up the teddies as if they have been torn apart, like the “crazy
 women’s” life had been so poked holes using scissors in the teddies mouths and pulled fur out from the inside. We wanted to reflect this women’s life through the teddy bears and as they were completely messed up it reflects her mental state and feelings are all over the place.
As we were using 2 teddies we decided to pull of one of their heads to make it look as if the women’s anger has been taken out on these and she has attacked them. After hard effort to rip the head of, and meant stabs with scissors in the neck of the fur to release the head we were finally able to take of the head and pull more of the insides out and scatter them all over the set. We wanted create the idea that this woman was mental and had gone crazy so we had to make sure we had the perfect set for this.
So we decided also to make the pyjamas looked messed up and poured blood all over them and again used hand prints and brushes to smear the blood everywhere. The reason that the pyjama top would not be closed is because as she has grown up in the institution I thought it would work well if it shows that she has grown out of the pyjamas and the reason that they are so small is because they are representing her childhood just like the teddy bears are.
Another prop we had was a big sheet, which was to represent where the killings have happened as this prop is in were she lays and is also covered in the blood. The blanket and teddies show her comfort zone, as from a young children normally feel attached to some sort of item so there props were showing this.
We decided to film in a hallway as we wanted to show how the woman has escaped, and as there is a red door out side of our class room the group thought that this was the perfect spot to film as the door shows freedom on the other side, but the red also had connotations of blood, which is shown in every shot.
We wanted to create a set of madness, and didn’t want to reveal too much through the setting and that’s why we have decided to not change the setting throughout as we don’t want to reveal too much of the storyline.
FILMING UPDATE
Looking over the footage we have previously filmed we came to the decision that we needed to film a more dramatic ending for our teaser trailer. So we done some more filming in lesson, we were trying to achieve an ending that will shock the audience. We had a few ideas of what to and tested them out, these included filming a short piece of the setting, using a steady cam to show what a mess the place was and to give the aud ience an understanding of what kind of stuff may have been going on. We used a point of view shot as we wanted it to look as if someone had come in and found this place. This was also to make the audience believe that the something had happened to the character in the teaser trailer had which would make them question her disappearance. This took a few trials as we decided to use the lens on the camera to zoom in on the setting to get a different perspective and to make it look more enclosed, we tried this shot at different paces and decided that we needed to
make it as sna ppy as possible as this would only be short piece of the trailer and this would allow us to bring up tension.
We used more of the fake blood by putting bloody handprints all over the floor, as well as writing “why?” in the blood on the floor. We wanted the camera to follow these handprints to so the audience follow it too, and it makes it look as if a murder or something gruesome has taken place. This would also make the audience question whose handprints they were, who wrote the letters in
the blood, and what does why actually mean.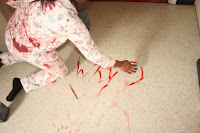
We were running out of time towards the end of the lesson but thought it would be good to have a shot of the character on the other side of the door as the camera, with her face pressed upon the door with blood running down her face and hands, but when we tried to film this we realised that the light reflected in the windows of the door and this could be seen on the camera so this would not work. So we thought that we could try a shot of this character sitting by the blood on the floor and then all of a sudden the hand of the woman smacks the camera with aggression, but because we wanted it to be quick it was hard to see
the hand flying towards the camera because it was too quick. We had to improvise this final shot and instead the camera followed the actress slightly and then she comes up and knocks the camera so it looks as if the camera has been attacked by her instead of the lens of the camera being smashed.
This filming session went well as we all cooperated in setting up the equipment and giving ideas of what to do and watching back footage after we filmed the shots, allowed us to see our mistakes and meant that we could re-film shots to make sure they were accurate. Hopefully we now have enough footage to put together in the editing process. We have already had discussions on what shots we are going to use and an order of what they are going in as we have had our story board and shooting a script for guidance. We are currently looking to find a sound track or instrumentals to go over our trailer, and taking into consideration we have to ask for permission we have been looking on YouTube as it is possible to contact the composers/owners.
 ience an understanding of what kind of stuff may have been going on. We used a point of view shot as we wanted it to look as if someone had come in and found this place. This was also to make the audience believe that the something had happened to the character in the teaser trailer had which would make them question her disappearance. This took a few trials as we decided to use the lens on the camera to zoom in on the setting to get a different perspective and to make it look more enclosed, we tried this shot at different paces and decided that we needed to
make it as sna
 ppy as possible as this would only be short piece of the trailer and this would allow us to bring up tension.
We used more of the fake blood by putting bloody handprints all over the floor, as well as writing “why?” in the blood on the floor. We wanted the camera to follow these handprints to so the audience follow it too, and it makes it look as if a murder or something gruesome has taken place. This would also make the audience question whose handprints they were, who wrote the letters in
the blood, and what does why actually mean.

We were running out of time towards the end of the lesson but thought it would be good to have a shot of the character on the other side of the door as the camera, with her face pressed upon the door with blood running down her face and hands, but when we tried to film this we realised that the light reflected in the windows of the door and this could be seen on the camera so this would not work. So we thought that we could try a shot of this character sitting by the blood on the floor and then all of a sudden the hand of the woman smacks the camera with aggression, but because we wanted it to be quick it was hard to see
the hand flying
 towards the camera because it was too quick. We had to improvise this final shot and instead the camera followed the actress slightly and then she comes up and knocks the camera so it looks as if the camera has been attacked by her instead of the lens of the camera being smashed.
This filming session went well as we all cooperated in setting up the equipment and giving ideas of what to do and watching back footage
 after we filmed the shots, allowed us to see our mistakes and meant that we could re-film shots to make sure they were accurate. Hopefully we now have enough footage to put together in the editing process. We have already had discussions on what shots we are going to use and an order of what they are going in as we have had our story board and shooting a script for guidance. We are currently looking to find a sound track or instrumentals to go over our trailer, and taking into consideration we have to ask for permission we have been looking on YouTube as it is possible to contact the composers/owners.
No comments:
Post a Comment